

 Account
 Billing
Get started with RecallBase
Use RecallBase to save a supported AI conversation locally, then export it from the popup, floating button, right-click menu, or Export Studio. You can start without an account.
Browse docsMenu
 Browse docs
 Docs home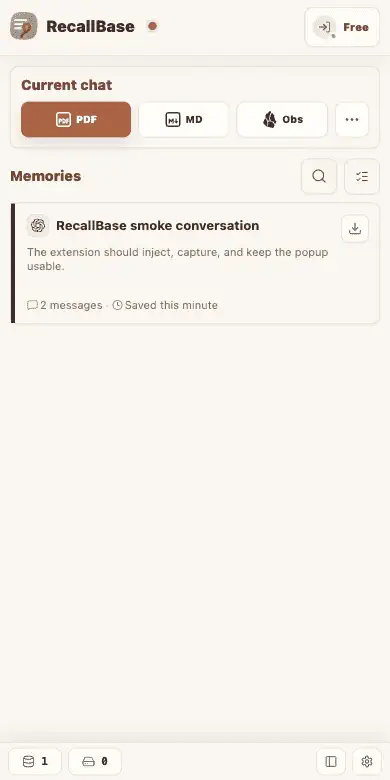
Step 1: Install the extension
Use the download page for the current install path. After installing, pin RecallBase to your browser toolbar so the popup is easy to open.
- 1
Open the download page.
- 2
Install RecallBase in your browser.
- 3
Click your browser's Extensions icon.
- 4
Pin RecallBase to the toolbar.
Step 2: Open a supported chat
Go to a real AI conversation page, not the app home page or settings page. RecallBase works best after the conversation has loaded.
- 1
Open a supported AI app.
- 2
Open an existing conversation or start one.
- 3
Wait until the messages are visible.
- 4
Open the RecallBase popup or use the floating button on the page.
Step 3: Choose where to export
Use the entry point that matches what you are doing right now. The popup is the clearest choice for beginners.
- 1
Popup: best for your first export and saved chats.
- 2
Floating button: fastest while reading the current chat.
- 3
Right-click menu: useful for browser-level shortcuts, including JSON.
- 4
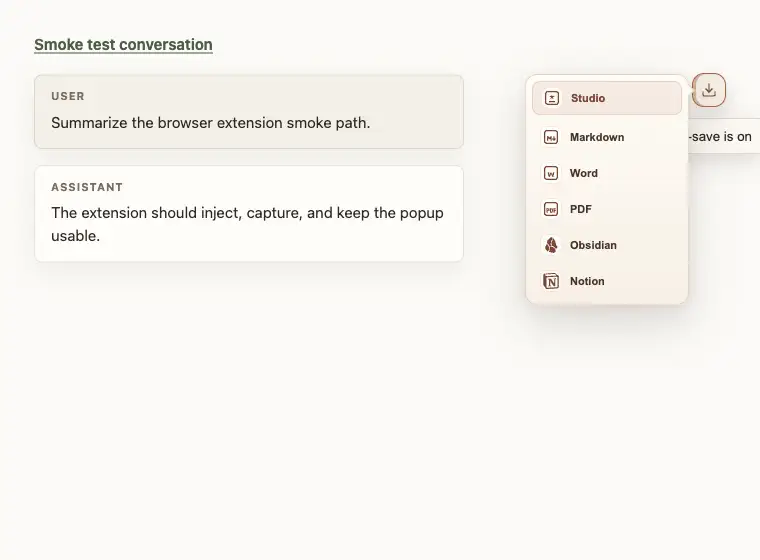
Export Studio: best when you want to preview, select messages, copy, or change layout.
Step 4: Export one file
For your first test, choose Markdown or PDF. Markdown saves a simple editable file. PDF opens your browser’s print or save dialog.
- 1
Open the RecallBase popup on the chat page.
- 2
Choose Markdown, PDF, Word, Image, Text, Copy Markdown, Copy Image, Obsidian, Notion, or Studio.
- 3
Wait for the download, clipboard copy, app-opening flow, or browser PDF dialog.
- 4
Check your Downloads folder, clipboard, Notion, Obsidian, or Export Studio preview.
Expected result
You should have one saved local conversation or one finished export. The RecallBase website does not need your raw prompt text, answer text, cookies, tokens, local file paths, or raw DOM.
What to do after the first export
After your first successful export, decide whether the conversation should stay only as a browser capture, become an editable Markdown note, or move into a document format for sharing. Markdown is the best default because it is unlimited, easy to diff, and readable by people and AI coding agents. PDF is better when the layout matters. Word is useful when someone needs to comment or revise the conversation in a document editor.
- 1
Use Markdown for long-lived local notes and agent-readable context.
- 2
Use PDF when you need a fixed record for review.
- 3
Use Word when the exported chat will be edited by another person.
- 4
Use Notion or Obsidian when the chat belongs in an existing knowledge base.
Keep the setup private
RecallBase does not need raw conversation text for website account checks. Treat exported files like any other local document: store them in a folder you control, avoid pasting sensitive prompts into support requests, and only send an export to another app when that app is the destination you chose.

